Beginner Succulent Care: 3 Quick Tests That Save Plants
Succulents stay healthy when they get bright light, fast-draining soil, a pot with drainage holes, and water on a soak-and-dry rhythm instead of a fixed schedule. Check the soil, not the calendar. If a pot stays soggy for days after watering, that’s your signal to repot into a grittier mix and cut back on how often you water.
TL;DR:
- Proper watering depends on checking soil moisture, not sticking to a fixed schedule, with the soil needing to be dry an inch or two deep before watering again.
- Bright light influences watering needs, as more sun speeds up water use; species selection and spot placement should match light conditions to avoid etiolation or bleaching.
- Using a gritty, well-draining soil mix and avoiding a gravel layer prevents root rot, with repotting recommended when roots circle or water drains straight through.
- Overwatering is the leading cause of succulent death, so test soil regularly and treat issues like rot or pests immediately to prevent plant loss.
- Propagation through leaf cuttings, offsets, and stem cuttings is straightforward, requiring callousing and proper soil to root successfully within a few weeks.
Table of Contents
- At-a-Glance Succulent Care Checklist For Beginners
- What Light and Temperature Do to a Succulent
- How Often Should You Water Succulents?
- Building a Fast-Draining Home for Succulent Roots
- Feeding and Adjusting Care Through the Seasons
- Fixing the Most Common Succulent Problems
- Propagating Succulents From Leaves, Offsets, and Cuttings
- Getting Care Advice Specific to Your Succulent and Home
- The One Habit That Fixes Most Succulent Problems
- Get Care Instructions Built Around Your Exact Succulent
- Sources
At-a-Glance Succulent Care Checklist For Beginners
Most succulent problems trace back to one of three things: not enough light, the wrong soil, or watering on autopilot. Fix those three, and everything else gets easier.
Start this week with:
- Move your plant to the brightest window you have, ideally with a few hours of morning sun; check that the pot has a drainage hole before you do anything else.
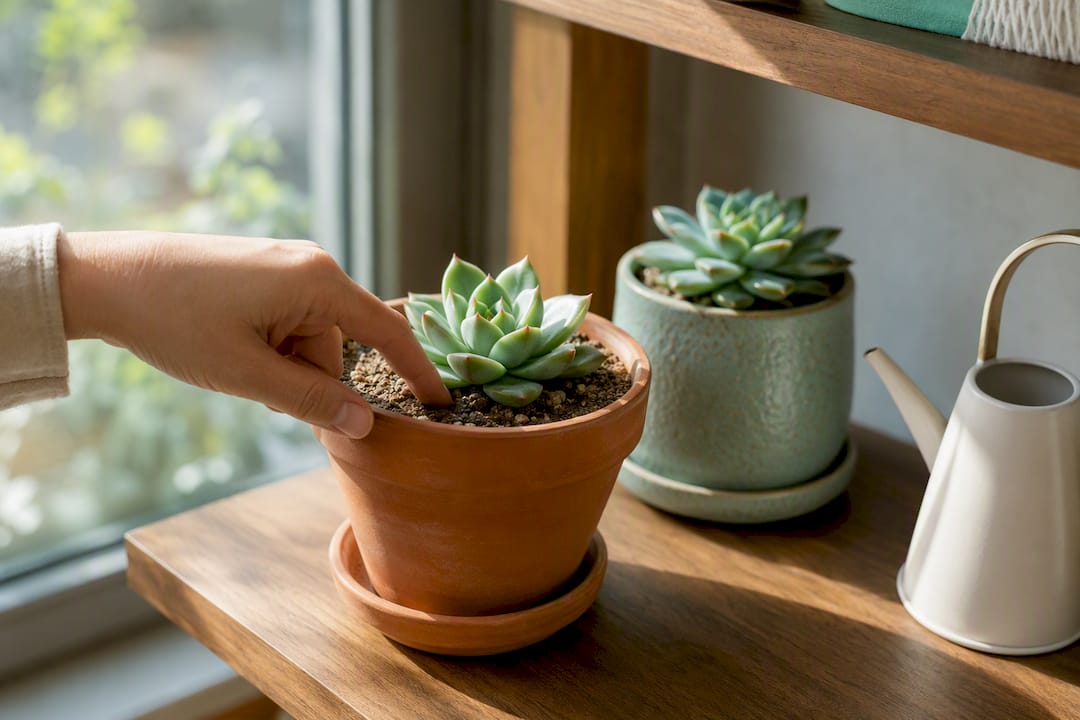
- Test soil moisture with a wooden skewer or a cheap moisture probe. Push it in an inch or two; if it comes out with damp soil clinging to it, wait to water.
- Water only when that lower soil layer is dry, not because a week has passed.
- Rotate the pot a quarter turn weekly so growth stays even, and watch for mushy leaves or a stretched, leggy stem. Both are early warning signs worth acting on fast.
None of this requires special equipment. A skewer from your kitchen drawer works as well as anything sold for the job.
What Light and Temperature Do to a Succulent
Light is the variable that decides almost everything else about succulent plant maintenance, including how often you’ll water. More light drives faster photosynthesis, which speeds up growth and water use. A succulent baking in a south-facing window dries out faster than the same plant on a north-facing shelf, even in identical pots.
Three rough light bands cover most home situations. Full sun, meaning four or more hours of direct rays, suits tough species like most Sedum and many Agave. Bright indirect light, the kind you get a few feet back from an unobstructed window, works for Echeveria, Haworthia, and most Aloe. Low light, tolerated but rarely thrived in, is where Sansevieria and ZZ plants hang on, though even these do better with more.

Your plant will tell you if the spot is wrong. Pale, washed-out color usually means too much direct sun for that species. A stem that stretches toward the window with wide gaps between leaves, sometimes called etiolation, means the opposite: not enough light.
Temperature matters almost as much. Most succulents grow actively between 65 and 80 degrees Fahrenheit and slow down or stop below 50. Every jump of about 10 degrees above roughly 75°F can roughly double how fast a plant uses water, which is why the same plant that needed water every two weeks in spring might need it weekly once summer heat sets in. Cooler autumn and winter temperatures slow growth, so watering should slow down too.
How Often Should You Water Succulents?
The soak-and-dry method is the rule almost every reliable source agrees on: drench the soil until water runs freely out the drainage hole, then don’t water again until the soil is dry one to two inches down. Texas A&M’s extension program points to overwatering as the single most common way people kill succulents, and checking soil directly beats guessing by the calendar every time.
You’ve got three practical ways to get water in:
- Top watering is the standard approach: pour water at the base of the plant until it drains through, avoiding the leaves where you can.
- Bottom watering means setting the pot in a tray of water for 10 to 15 minutes and letting the soil pull moisture up through the drainage hole. It’s a smart default for crowded rosettes or soil that’s gone hydrophobic and repels water from the top.
- Submerging works for small pots: dunk the whole thing briefly, let it drain fully, and never let it sit in standing water.
Baseline frequency depends heavily on your setup, but a general starting point is worth having on hand.
Watering intervals vary based on pot size, light, and season, with smaller pots and brighter light generally requiring more frequent watering, but exact intervals should be determined by soil moisture and plant needs.
Treat those numbers as a starting point, not a rule. Terracotta pots dry faster than plastic or glazed ceramic. Thick-leaved species like Echeveria and Aloe tolerate longer dry stretches than thin-leaved trailing types like String of Pearls, which need water more often despite technically being succulents too.
Building a Fast-Draining Home for Succulent Roots
Soil is where most beginner succulent care goes wrong, usually because of one persistent myth. A good mix is roughly 50% inorganic amendment, such as pumice, perlite, or coarse sand, blended with 50% regular potting mix. That ratio lets water pass through quickly instead of pooling around the roots.
Skip the layer of gravel at the bottom of the pot. It feels like it should help, but it actually creates what horticulturists call a perched water table: water collects at the boundary between the coarse gravel and the finer soil above it, keeping the root zone wetter than it looks. The fix isn’t a drainage layer. It’s a uniformly gritty mix all the way through the pot, paired with an actual drainage hole.
- Choose terracotta over plastic when you can. It’s porous and dries faster, which forgives overwatering mistakes.
- Repot when roots circle the pot’s edge, growth stalls, or water runs straight through without the soil holding any moisture at all.
- When you repot, gently loosen old soil from the roots by hand rather than tugging, and let cut or broken roots dry for a day before placing the plant in fresh mix.
Pro Tip: Pumice is often the better choice over perlite if you can find it locally. It holds a bit more moisture than perlite while still keeping the mix airy, which forgives the occasional missed watering day.
Feeding and Adjusting Care Through the Seasons
Succulents aren’t heavy feeders. A balanced liquid fertilizer diluted to half strength, applied once during the spring and once in early summer, covers most needs. Skip feeding entirely once growth slows in fall.
Dormancy shows up as stalled growth and sometimes a slight dulling of color, usually triggered by shorter days and cooler temperatures. Watering should drop off with it. A plant that took water weekly in July might only need it monthly by December.
Spring and summer call for more frequent soil checks and, if you’re moving plants outdoors, a gradual introduction to direct sun to avoid scorching leaves that adjusted to indoor light over winter.
Fixing the Most Common Succulent Problems
Overwatered succulents look mushy, sometimes translucent, with leaves that feel soft rather than firm; black or brown stem tissue signals rot has already started. Underwatered plants wrinkle and shrink but usually feel firm, and a good soak brings them back within a day or two.
- Identify the problem first. Squeeze a leaf gently; mushy means too much water, wrinkled and papery means too little.
- For overwatering, stop watering immediately, and if the pot feels waterlogged, remove the plant and let the roots dry out on a paper towel for a few hours before repotting into dry mix.
- For pests, mealybugs show up as white cottony clumps in leaf joints, fungus gnats hover near overly moist soil, and scale appears as small brown bumps on stems. Isolate the plant, wipe pests off with a cotton swab dipped in rubbing alcohol, and recheck weekly.
- When rot has set in, unpot the plant, cut away any black or mushy roots and stem tissue with a clean blade, let the cut surface callous for a day or two, then repot in fresh, dry mix and hold off watering for a week.
Pro Tip: Fungus gnats almost always mean the soil is staying wet too long. Treating the bugs without fixing the watering habit just brings them back in a month.
Propagating Succulents From Leaves, Offsets, and Cuttings
Propagation is low-risk and a good way to rescue a plant that’s rotting from the base or gotten too leggy to save whole.
- Leaf cuttings: Twist a healthy leaf off cleanly at its base, no torn edges. Let it callous for two to three days on a dry surface, then lay it on top of well-draining soil. Roots typically appear in two to three weeks; a tiny new rosette follows.
- Offsets (pups): Once a baby rosette growing at the base of the parent plant has its own small roots, gently separate it with a clean cut or twist and plant it in its own pot with barely damp soil.
- Stem cuttings: Cut a healthy stem section, remove the lower leaves, and let the cut end callous for three to five days before potting. Keep the soil just barely moist until you see new growth, which signals roots have taken hold.
Getting Care Advice Specific to Your Succulent and Home
A general succulent care guide can only take you so far because your apartment’s light, your local humidity, and your specific species all change the math. That’s the gap Viridia is built to close. Snap a photo, and Viridia’s plant identification tool names the species and pulls up care guidance adjusted for your climate and soil conditions rather than generic averages.
From there, the workflow is simple: take a photo, get a tailored watering and soil plan back, and let Viridia’s health diagnosis feature flag problems like early rot or pest damage before they spread, then track recovery over time. Viridia’s plant catalog covers thousands of species with the same level of detail, including trees like the giant sequoia, for anyone managing more than a windowsill collection.
The One Habit That Fixes Most Succulent Problems
Most people fail at succulent plant maintenance because they follow a watering schedule pulled from a plant tag instead of checking the actual plant. That’s backwards. The soil-dry test takes ten seconds, and it will tell you more than any calendar ever will.
If your plant is struggling right now, don’t overthink the fix. Check the drainage hole first, then the soil texture, then the light. Nine times out of ten, the answer is one of those three. Succulents respond slowly, sometimes over weeks rather than days, so give a change time to show before you make another one. Track what you tried and when. That small habit of noticing and adjusting, rather than assuming, is what separates people who keep succulents thriving for years from people who replace them every spring.
— Dan
Get Care Instructions Built Around Your Exact Succulent
A frequency table gets you close, but it can’t account for your specific pot, your window’s exposure, or the particular quirks of the species sitting on your sill. Viridia closes that gap by identifying your plant from a photo and building a watering and soil plan around your actual climate and light conditions, not a generic average.

Once your plant is identified, Viridia’s health diagnosis feature flags early trouble, whether that’s a leaf starting to soften or a stem showing the first signs of stretch, and suggests a specific fix rather than a general tip. Recovery tracking then lets you see whether that fix actually worked over the following weeks, instead of guessing. Every plant in Viridia’s catalog, from houseplants to full trees like the boxelder maple, gets this same level of detail.
If you’re ready to stop guessing at your own plant’s needs, take Viridia’s plant care tools for a spin and get a care plan built around what’s actually growing in your home.
Sources
- Succulents | UC Master Gardeners of Santa Clara County
- How To Care For Succulents – Texas A&M Stories
- How often to water succulents: frequency guide | SucculenCare
- How Often to Water Succulents Plus 4 Serious Signs to Watch | The Spruce