Reachable Raised Bed Planning: 4×8 Templates for Gardeners
Start with a 4×8 bed (or 4×4 if space is tight), keep the width at 4 feet or less so you can reach the center from either side, and go 12 inches deep for most crops, 18 for carrots and potatoes. Leave 18 to 24 inches of path for walking and 30 inches wherever a wheelbarrow needs to pass. Orient the bed so taller plants don’t shade the rest, and plant in square-foot blocks instead of rows. That’s raised bed planning in one breath. Everything below fills in the why.
TL;DR:
- Keep raised beds no wider than 4 feet to ensure accessibility and prevent soil compaction from stepping into the planting area.
- A depth of at least 12 inches is suitable for most crops, but root vegetables like carrots and potatoes benefit from 18 to 24 inches.
- Pathways should be at least 18 inches wide for foot traffic and 30 inches where wheelbarrows or garden carts are used, to avoid damaging beds.
- Use square-foot planning to optimize plant spacing and increase yield, converting seed packet instructions designed for field rows accordingly.
- Select materials carefully, prioritize width and reachability over other design choices, and use tools like Viridia for early problem detection and efficient garden management.
Table of Contents
- Raised Bed Sizes and Dimensions That Actually Work
- How Do You Lay Out a Raised Bed Garden?
- Building the Right Soil Mix and Filling Your Beds
- Picking Plants and Spacing Them for Maximum Yield
- Copy-Ready Raised Bed Layout Templates
- Planning Successions and Rotations So Beds Stay Productive
- Watering and Maintenance That Fits Your Schedule
- Your Pre-Build Materials and Site Checklist
- How Viridia Fits Into a Raised Bed Plan
- What Most Raised Bed Guides Get Backward
- Track What You Planted, Not Just Where
- Where to Verify These Numbers
- Sources
Raised Bed Sizes and Dimensions That Actually Work
Width matters more than any other measurement you’ll choose. A bed wider than 4 feet forces you to step into the soil to reach the middle, which compacts it and defeats the purpose of building a raised bed in the first place. If the bed sits against a fence or wall and you can only work from one side, cut that number to 2 or 3 feet. Length is more forgiving. An 8-foot bed uses standard lumber without waste, but anything past 8 to 12 feet needs a mid-span support board underneath, or the sides will bow outward once they’re full of wet soil.
Depth is where most first-time builders guess wrong. A 12-inch depth works as a safe, all-around number for the majority of vegetables, but root crops like carrots and potatoes want at least 18 inches to develop properly. Shallow-rooted greens and herbs can get by on 6 to 8 inches if you’re stacking a bed on top of decent native soil.
| Crop type | Minimum depth | Comfortable depth |
|---|---|---|
| Lettuce, spinach, herbs | 6 in. | 8 in. |
| Tomatoes, peppers, beans | 12 in. | 18 in. |
| Carrots, potatoes, parsnips | 18 in. | 24 in. |
Do the soil math before you order anything. A standard 4×8 bed at 12 inches deep needs 32 cubic feet of fill, which is a little under 1.2 cubic yards. Bump that to 18 inches for a root-crop bed and you’re at 48 cubic feet, or 1.8 cubic yards. If the bed sits on a patio, driveway, or any hardscape, go with at least 12 inches and make sure the bottom drains freely, since roots can’t push down into anything underneath the way they can on open ground.
How Do You Lay Out a Raised Bed Garden?
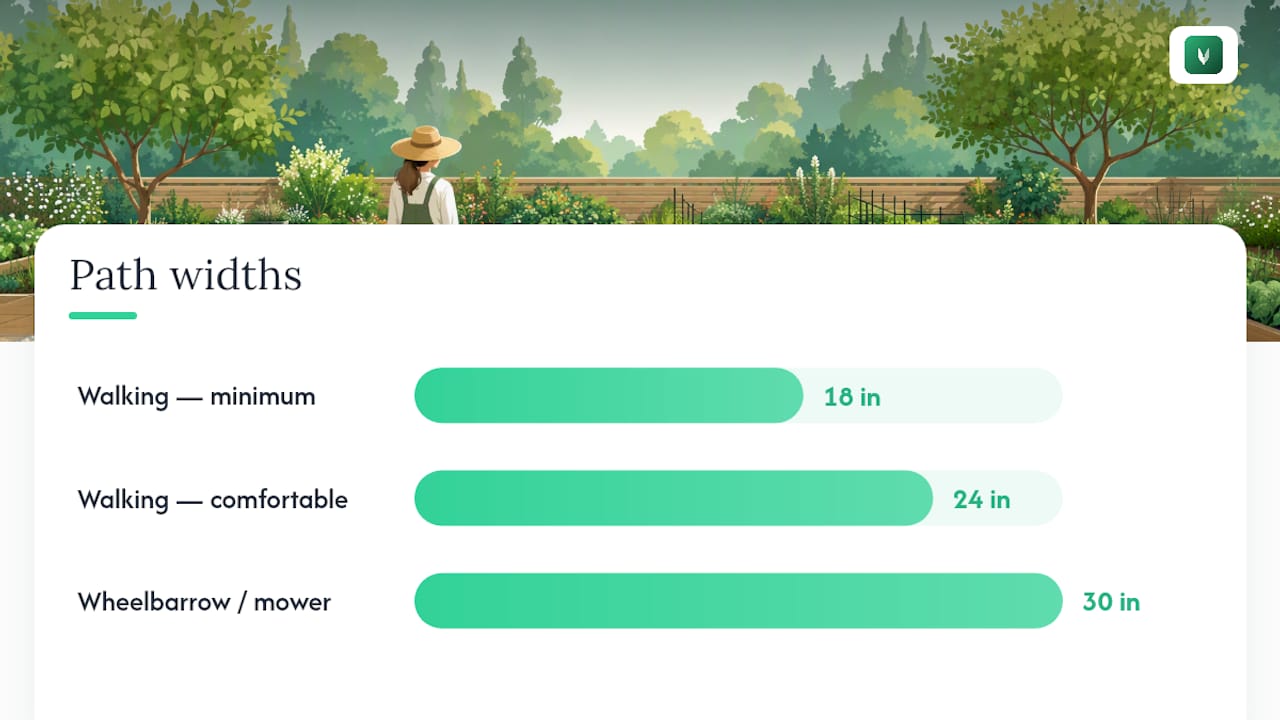
Once you know your bed dimensions, the harder problem is fitting several of them into a yard without creating a maze you dread walking through. Paths are the backbone of that layout, and the standard is simple: 18 to 24 inches for regular foot traffic, and 30 inches wherever a wheelbarrow, mower, or garden cart needs to pass. Skimp on path width and you’ll end up trampling bed edges just to get past each other.
Orientation affects yield more than most people expect. If your beds run east to west, put the tallest plants (staked tomatoes, pole beans, trellised cucumbers) on the north side so they don’t shade shorter crops for half the day. Beds running north to south spread sun more evenly across the whole bed regardless of plant height, which is why a lot of experienced growers default to that layout when the yard allows it.
Placement matters just as much as orientation. A bed tucked in a back corner gets ignored. One visible from your kitchen window or sitting along your daily path to the trash cans gets watered, weeded, and harvested on time, because proximity to daily foot traffic directly increases how often you actually tend the garden.
Before you cut a single board, test the plan on the ground:
- Drive stakes at the corners of each proposed bed and run string between them.
- Cut cardboard to the size of your planned beds and lay it flat where the beds will sit.
- Walk your normal watering and harvesting route through the mock layout.
- Reach toward the center of each bed from every side to confirm nothing is out of arm’s reach.
Testing with stakes and string catches problems, like a hose bib that’s suddenly blocked or a path that’s too narrow for your wheelbarrow, before you’ve spent money on lumber.
Pro Tip: Take a photo of your stake-and-string layout at different times of day. Shadows from a nearby tree or fence show up in ways you won’t predict just by looking at a compass.
Building the Right Soil Mix and Filling Your Beds
A reliable starting recipe is roughly 50 to 60% topsoil combined with 40 to 50% compost, with a handful of coconut coir or perlite mixed in for aeration if your topsoil runs heavy on clay. This ratio balances nutrient content with drainage better than straight bagged garden soil, which tends to compact hard after a season of watering.
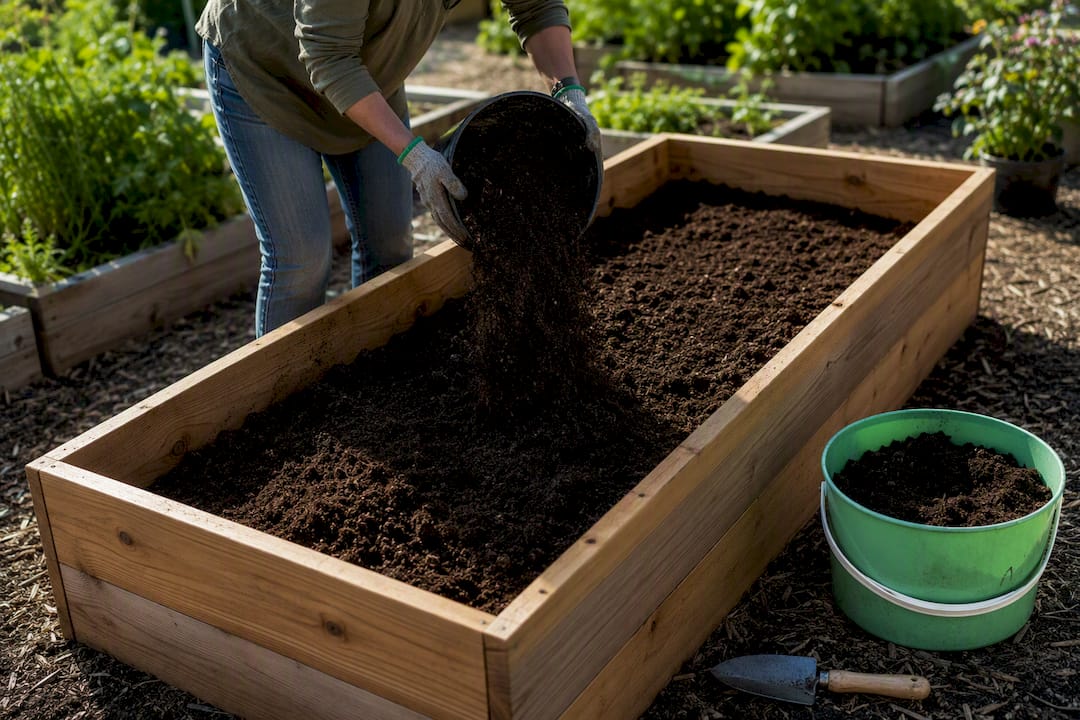
You’ve got two ways to fill a bed. Layering means building distinct bands, coarse material at the bottom, compost in the middle, topsoil on top, and letting worms and watering blend them over time. Mixing means combining everything before it goes in the bed, which costs more labor up front but gives you even texture from day one. Layering saves money and works fine for beds you’re not planting immediately; mixing is worth the extra effort if you’re direct-seeding within a week or two.
Hugelkultur, building the base of a deep bed from logs, branches, and other woody material before topping it with soil, cuts how much purchased fill you need by a real margin, especially in beds over 18 inches deep. Skip fresh, green wood, though. Fresh wood pulls nitrogen out of the surrounding soil as it breaks down, starving your plants in their first season. Use well-aged, partially decomposed wood and cap it with a generous compost layer to buffer that nitrogen drawdown.
Bulk-order topsoil and compost from a landscape supplier almost always beats bagged soil on price once you’re filling more than one or two beds. A few things to check before you order:
- Ask the supplier what the compost is made from; municipal compost can carry more salt and debris than a dedicated soil yard’s blend.
- Confirm delivery access. A dump truck needs a clear path, and a lot of city lots don’t have one.
- If the bed sits over old pavement, contaminated soil, or a site you’re unsure about, a raised bed lets you garden on top of it safely rather than digging in.
Building your own compost cuts long-term costs, but bulk delivery is the faster path for a first-year garden.
Picking Plants and Spacing Them for Maximum Yield
Seed packets give you row spacing because they’re written for field farming, not raised beds. Convert that number into square-foot spacing and you’ll fit far more into the same footprint. A packet that says “space plants 12 inches apart in rows 24 inches apart” is really telling you to give each plant about 1 square foot, since raised beds skip the wasted walking rows entirely. Square-foot planting consistently outproduces row planting per square foot of growing space because nothing is set aside for aisles you won’t need inside the bed itself.
Group plants by how much water and attention they need, not just by what looks good together. Basil and tomatoes both want steady moisture and full sun, so they pair well. Rosemary wants to dry out between waterings and sulks next to anything getting daily irrigation.
Here’s what actually fits in one square foot, based on common intensive-planting charts:
- One tomato plant, staked or caged, needs roughly 4 square feet to itself.
- Sixteen leaf lettuce transplants can pack into a single 4-square-foot block.
- Bush beans go 9 per square foot; pole beans need a trellis and about 8 per square foot along it.
- Carrots and radishes run 16 per square foot since they barely need room above ground.
- Peppers want 1 plant per square foot, similar spacing to bush beans but taller.
Squash, melons, and cucumbers break this whole system if you let them. Give sprawling vines their own dedicated bed, or train them vertically on a trellis, rather than letting them swallow a mixed planting block.
Pro Tip: Sketch your square-foot grid on paper before you buy a single seed packet. It’s much easier to swap two crops on paper than to rip out transplants three weeks in.
Copy-Ready Raised Bed Layout Templates
A 4×8 bed split into square-foot blocks gives a family of four a genuinely useful harvest without overwhelming anyone’s kitchen counter. A reasonable mix: 4 tomato plants (using 16 of the 32 squares), 4 pepper plants, 8 squares of bush beans, and 4 squares split between lettuce and herbs.
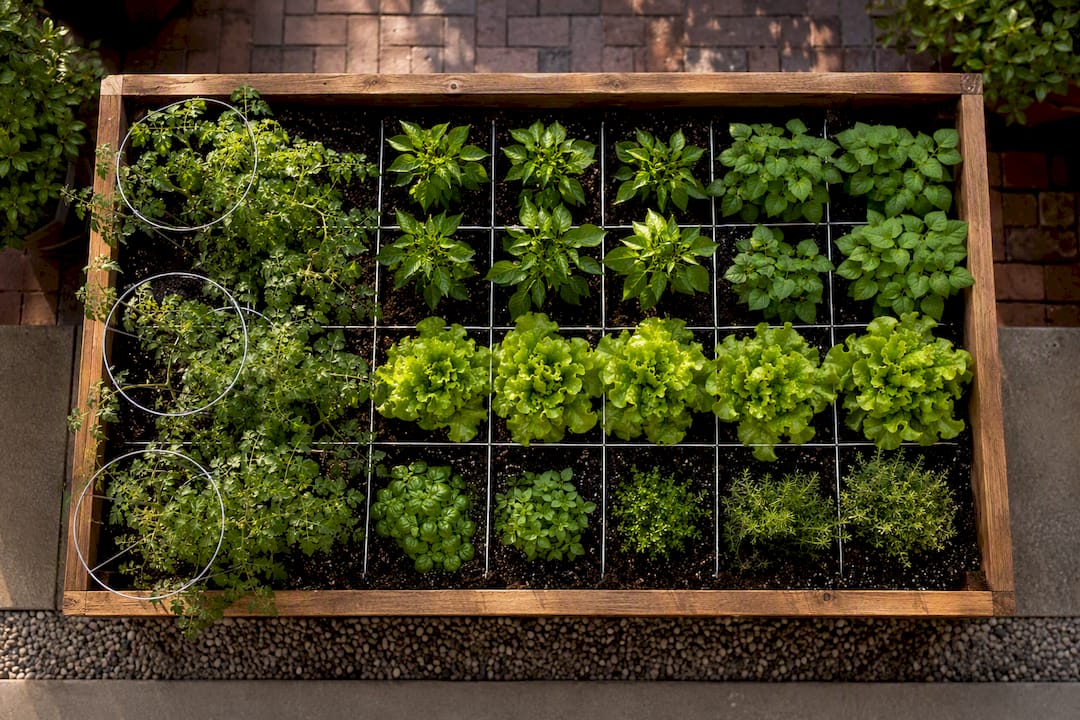
For beginners, a 4×4 bed focused on greens and herbs is the lowest-risk starting point. Sixteen squares split between lettuce, spinach, basil, and a couple of squares of green onions gives fast results and forgives mistakes better than fruiting crops do.
A narrow 2×4 bed fits a balcony or a tight side yard. Skip anything that sprawls or grows tall enough to shade its neighbors. Herbs, lettuce, and a single pepper plant are realistic; a full tomato cage is not.
| Template | Dimensions | Best for | Sample crop mix |
|---|---|---|---|
| Family plan | 4×8 ft | Established gardeners | Tomatoes, peppers, beans, greens |
| Beginner plan | 4×4 ft | First-year gardeners | Lettuce, spinach, basil, onions |
| Narrow plan | 2×4 ft | Balconies, side yards | Herbs, lettuce, one pepper |
| Accessible plan | 4×4 ft, 24–30 in. tall | Seated or limited-mobility gardeners | Herbs, lettuce, bush beans |
The accessible template deserves its own note. Building the bed 24 to 30 inches tall brings the soil surface up to seated height, which turns weeding and harvesting from a kneeling chore into something you can do from a chair or a garden stool. This design pairs well with the person-centered approach to accessible garden design that occupational therapists and care groups have documented for gardeners with limited mobility.
Planning Successions and Rotations So Beds Stay Productive
A single raised bed can produce three separate harvests in one year if you plan the calendar ahead of time. Spring lettuce and spinach clear out by early summer, right when you’d be transplanting tomatoes and peppers anyway. Those summer crops run until early fall, at which point a second round of quick-growing greens or radishes fills the same space before frost.
Rotation matters even in a small bed. Grouping crops by family (nightshades like tomatoes and peppers, brassicas like broccoli and kale, legumes like beans and peas) and moving each group to a different bed the following year cuts down on soil-borne disease and pest buildup tied to any one crop.
A few habits make this easier to manage:
- Keep a simple garden journal, paper or digital, noting what grew where and when it was planted.
- Add a lightweight hoop and row cover to extend your last fall harvest by several weeks.
- Rotate legumes into a bed the year after a heavy-feeding crop like tomatoes, since beans and peas add nitrogen back to the soil.
- Never plant the same family in the same bed two years running if you can help it.
Watering and Maintenance That Fits Your Schedule
Hand-watering works fine for one or two beds if you’re home daily, but it’s the first thing to fail once you go on vacation or add a third and fourth bed. Soaker hoses are a cheap middle ground, snaking through the soil under mulch and delivering water slowly enough to soak in rather than run off. Drip irrigation on a timer is the most reliable option for anyone managing more than a couple of beds, since it waters consistently whether you remember or not.
Mulch does double duty: a 2 to 3 inch layer cuts watering frequency by slowing evaporation, and a fresh compost top-dress each spring reduces how much fertilizer you need for the season. A short seasonal checklist keeps beds from sliding into neglect:
- Check stakes, cages, and trellises for damage before the growing season ramps up.
- Scout for pests weekly once plants are established; early catches are easier to manage than infestations.
- Clear spent plants and add a fresh compost layer at the end of the season.
- Cover bare soil with mulch or a cover crop over winter to protect the soil life underneath.
Pro Tip: A thick straw mulch left on through winter keeps earthworms and beneficial microbes active even when the surface freezes, so beds wake up healthier come spring.
Your Pre-Build Materials and Site Checklist
Getting the site right before lumber shows up saves you from rebuilding later. Run through this list on build day:
- Clear the site down to bare ground and check that it’s reasonably level; a slope over a few inches needs terracing or extra framing.
- Confirm the spot isn’t sitting over a septic drainfield or buried utility line.
- Measure the distance to your nearest water spigot; anything past 50 feet makes hand-watering a chore.
- Choose your material: cedar or another rot-resistant wood for a natural look, galvanized metal for durability, or composite/plastic for zero maintenance. Avoid older pressure-treated lumber that used chromated copper arsenate.
- Decide between bulk delivery and bagged soil based on how many beds you’re filling; bulk almost always wins past two beds.
- Stake out the final layout with string one more time and walk the full route before the first board goes into the ground.
How Viridia Fits Into a Raised Bed Plan
Once your beds are built and planted, keeping track of what’s growing where gets harder than the planning stage ever was. Viridia’s plant identification tool lets you photograph anything that shows up unexpectedly and get an instant answer, paired with care advice tuned to your specific climate and soil.
The gap between a good layout on paper and a thriving bed months later is almost always tracking, not planning. Knowing what’s struggling, and why, before it dies is worth more than the perfect square-foot grid.
A health diagnosis feature flags problems on your tomatoes or peppers early and suggests treatment, then tracks recovery over the following weeks. Log your succession planting dates in a digital journal and use reminders to know when the next round is due.
What Most Raised Bed Guides Get Backward
Most advice on this topic front-loads material choices, cedar versus metal versus composite, when the decision that actually determines whether a garden thrives is width. A bed you can’t reach into without stepping on the soil undermines every other choice you make, and I’d argue reachability deserves to be decided before a single board is purchased.
The other place conventional wisdom falls short is treating row spacing as gospel. Seed packets are written for tractors and field rows, not 4-foot-wide beds, and gardeners who convert to square-foot spacing consistently get more food out of the same footprint. Templates help here because they remove the guesswork; copying a proven 4×8 layout beats improvising from a seed packet’s row instructions.
Where I’d push back on the DIY-only crowd: once beds are in the ground, tracking what’s happening in them is its own skill, separate from design. A tool built to spot problems early and remind you when to plant the next succession does something a static layout on graph paper simply can’t.
— Dan
Track What You Planted, Not Just Where
You’ve got a template now, and boards in the ground, and a square-foot grid on paper. What happens six weeks in, when one square looks off and you’re not sure if it’s a pest, a nutrient gap, or just an unlucky week of weather? That’s the gap a paper plan can’t close on its own. Viridia takes a photo of that struggling plant and gives you a diagnosis plus a treatment suggestion in seconds, then tracks whether it actually recovers.

Beyond diagnosis, the app builds a running garden journal from your planting dates, so your succession schedule and rotation notes live in one place instead of scattered across sticky notes. If you’d rather skip the DIY layout process entirely, Viridia’s custom garden planning tool can map bed positions and planting zones for you based on your yard’s actual sun and soil conditions. Open the app, snap a photo of your first bed, and see what it flags before your next watering day.
Where to Verify These Numbers
For dimension and depth standards, the University of Georgia’s raised bed guide lays out path-width recommendations in detail. The Old Farmer’s Almanac covers soil mix ratios gardeners have relied on for decades, and Cultivating Flora’s layout guide walks through the stake-and-string testing method step by step.
Sources
- Raised garden bed dimensions | Field Report (UGA)
- Best raised bed size & depth guide (2026) | Raised Garden Hub